Custom Input
Check customer documents against a custom template
Overview
Custom Input is a tool you can add to your workflow that allows you to verify your customer by filling out a questionnaire. You can use this tool in addition to or to replace the Documentation Verification tool.
Contact us to enable this feature
Contact your account manager or email [email protected].
Availability
🌎 Available globally
Features
The Custom Input tool lets you control the data your customer provide, including:
- What data customer provide
- How to organize the data
- How customers can enter data
- What data is mandatory or optional
Setup
Step 1: Set Up a Workflow
When you add a Custom Input merit to your workflow, you can choose to:
- Add an input field customer to enter their
- Add a group to group an individual's data into categories
- Add a selector with sub-input to create different customer flows dependent on the individual's choices (such as different document types)
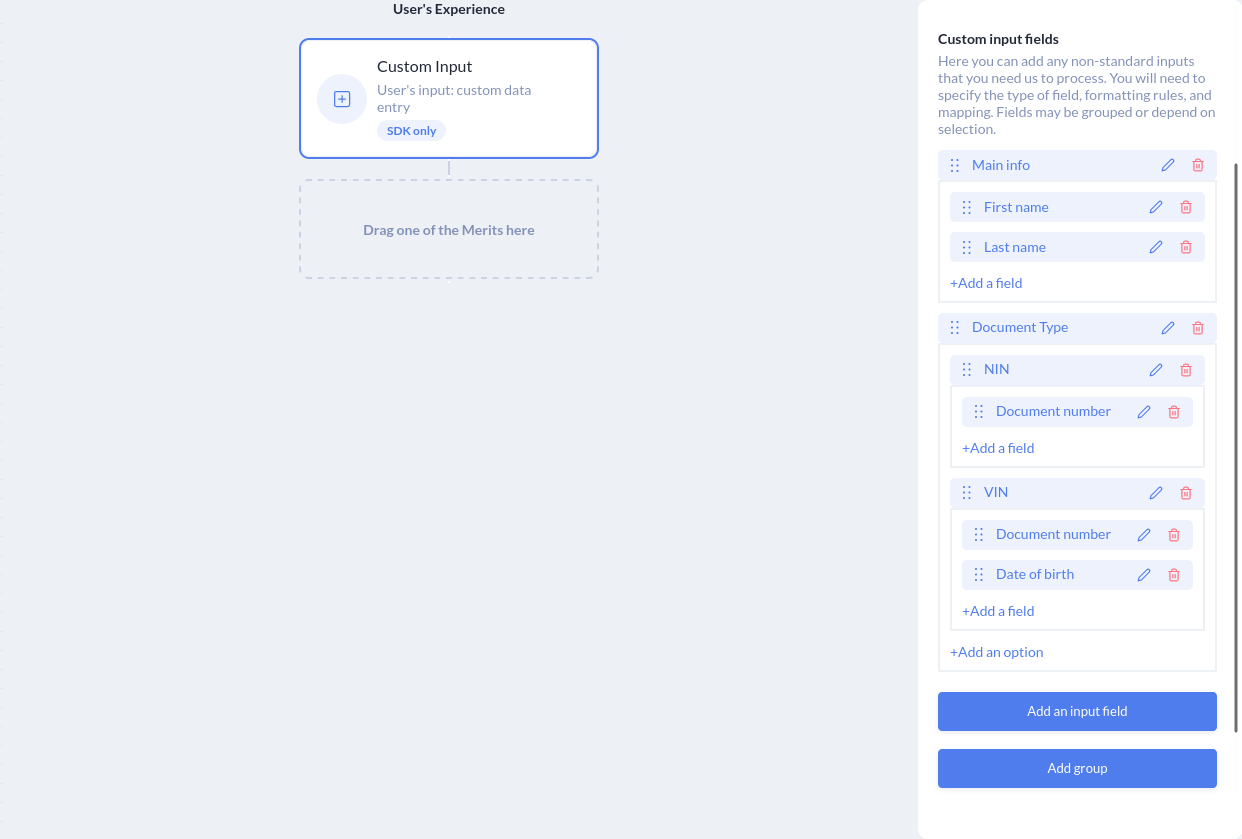
Custom input Dashboard screen with data fields. Data fields are grouped by Main info (name), Document Type (NIN and VIN). Document types have subfields for document number.
Add an Input Field
When you add a field to your questionnaire you can specify a field system name for you internal purposes, as well as a field display name that faces your customers.
You can configure your fields to be one of four data types:
- Alpha-numeric (letters and number)
- Date picker (select a date from a pull-down calendar)
- Checkbox (pick one or more options from a list)
- Selector (pick one option from a list)
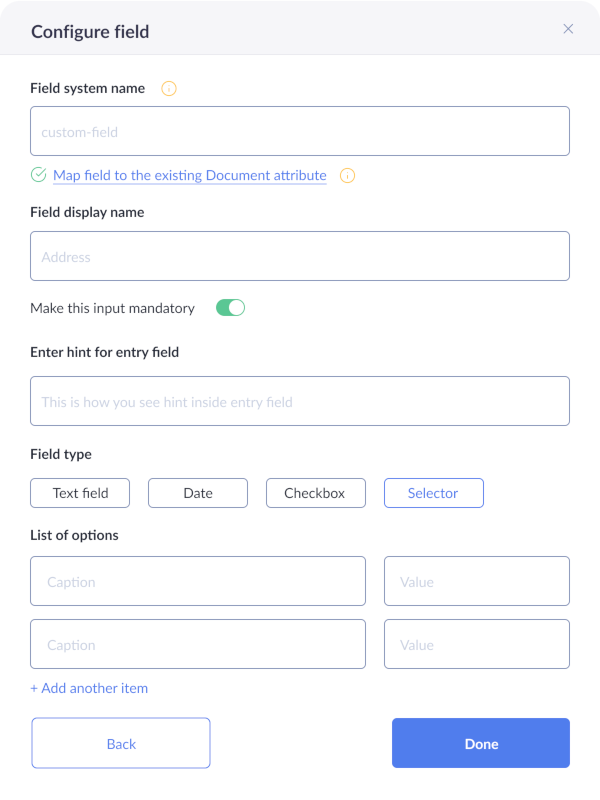
Field configuration screen with "Selector" chosen.
Add a Group
Create a group to help organize your customer's data. You can also use groups to nest data.
When you add a group to your questionnaire, you can add a system name for your internal system use, and a group display name that faces your customers. You can also add a thumbnail to the group to help customers differentiate groups.
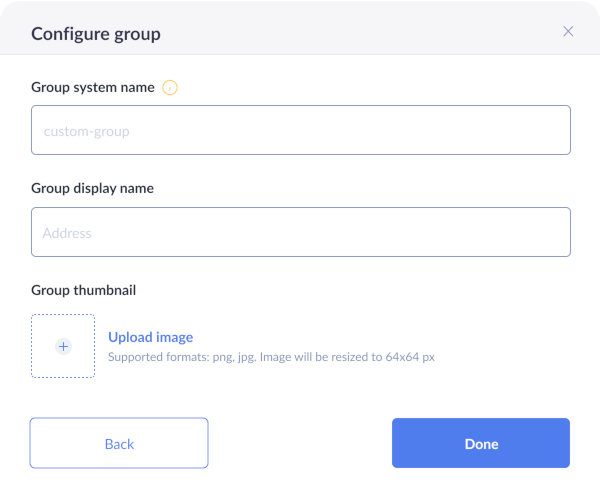
After you have finished naming your group, you can add the following to your group:
- A group caption to describe your group
- Input field
- Selection with sub-input
- Group
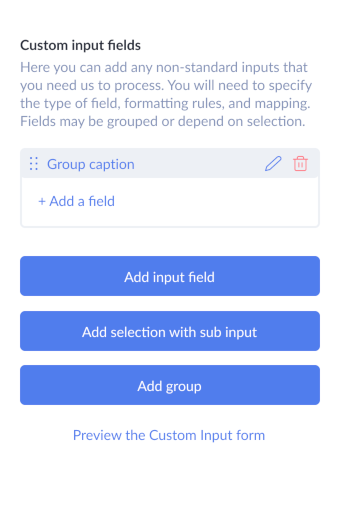
Custom input field selector for a group.
Add a Selector with Sub-Input
Add a selector when you need to create data-dependent user flows.
The selector screen lets give the selection a system name for you internal system use
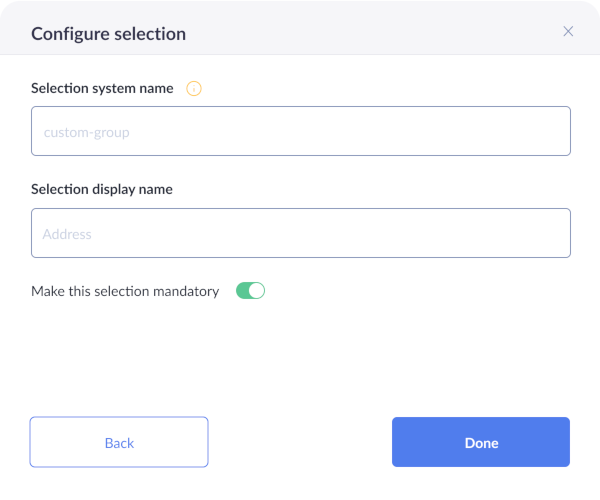
Selector configuration screen
After you have finished naming your selector, you can:
- Add options
- Name options
- Add fields to the options
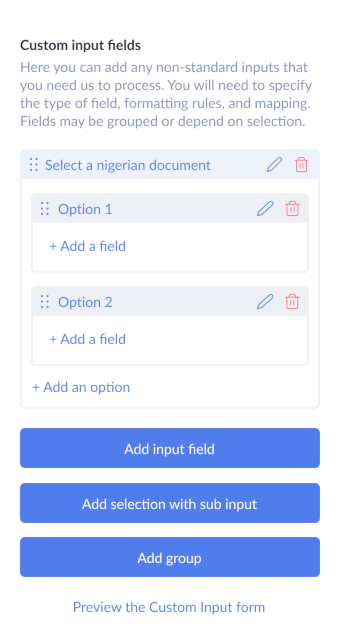
Custom input dashboard screen with a selector with two options.
Step 2: Integrate
There are 2 ways you can use MetaMap's Custom Input:
- Direct Link — Send your users a link to enter their information on MetaMap's prebuilt UX
- MetaMap Button — Integrate our MetaMap Button SDK into your application to use our prebuilt UX
Direct Link
If you are not a developer, or you don't have the resources to integrate at this time, you can start using MetaMap's Custom Input product in minutes without any code with our Direct Link.
To implement this:
- Set up the workflow for Custom Input in the dashboard
- Get the Direct Link
- Send the Direct Link to your customers
Integrate our MetaMap Button via SDK
Use our SDK integration if you want to use MetaMap's verification tools but design your own Custom Input experience for your customers.
To implement this:
- Set up the workflow for Custom Input in the dashboard
- Install and implement an SDK framework
Custom Input will produce one of three results:
- Verified
- Rejected
- Marked for manual review
There are two ways you can process verification results for Custom Input:
- In the Dashboard
- Using Webhooks
Dashboard Verification Results
In the Dashboard, visit the Verifications tab, and click on a Verification to review the results. These are the checks that indicate whether or not an individual has passed a Custom Input verification: Rejected/Review needed.
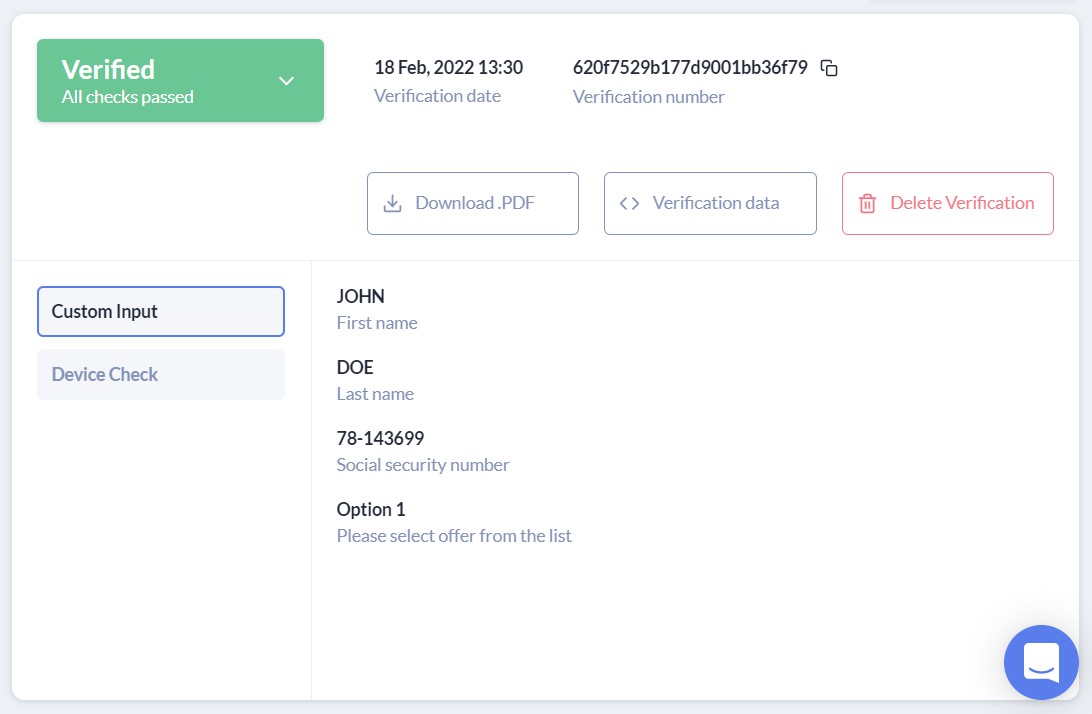
Custom input: Individual verified
Updated about 2 years ago