Workflows
Configure the steps your users follow to get trusted
Overview
A workflow allows you to build the logic to evaluate an individual's merits and decide whether to accept or reject them. You can add a series of different workflows to help you verify the individual's trustworthiness or authenticate them at any point in your customer's journey.
MetaMap allows you to create multiple workflows and customize the merits that make up each workflow in the Dashboard.
What is a workflow?
Read more about workflows here!
Create a Workflow
Start with a template
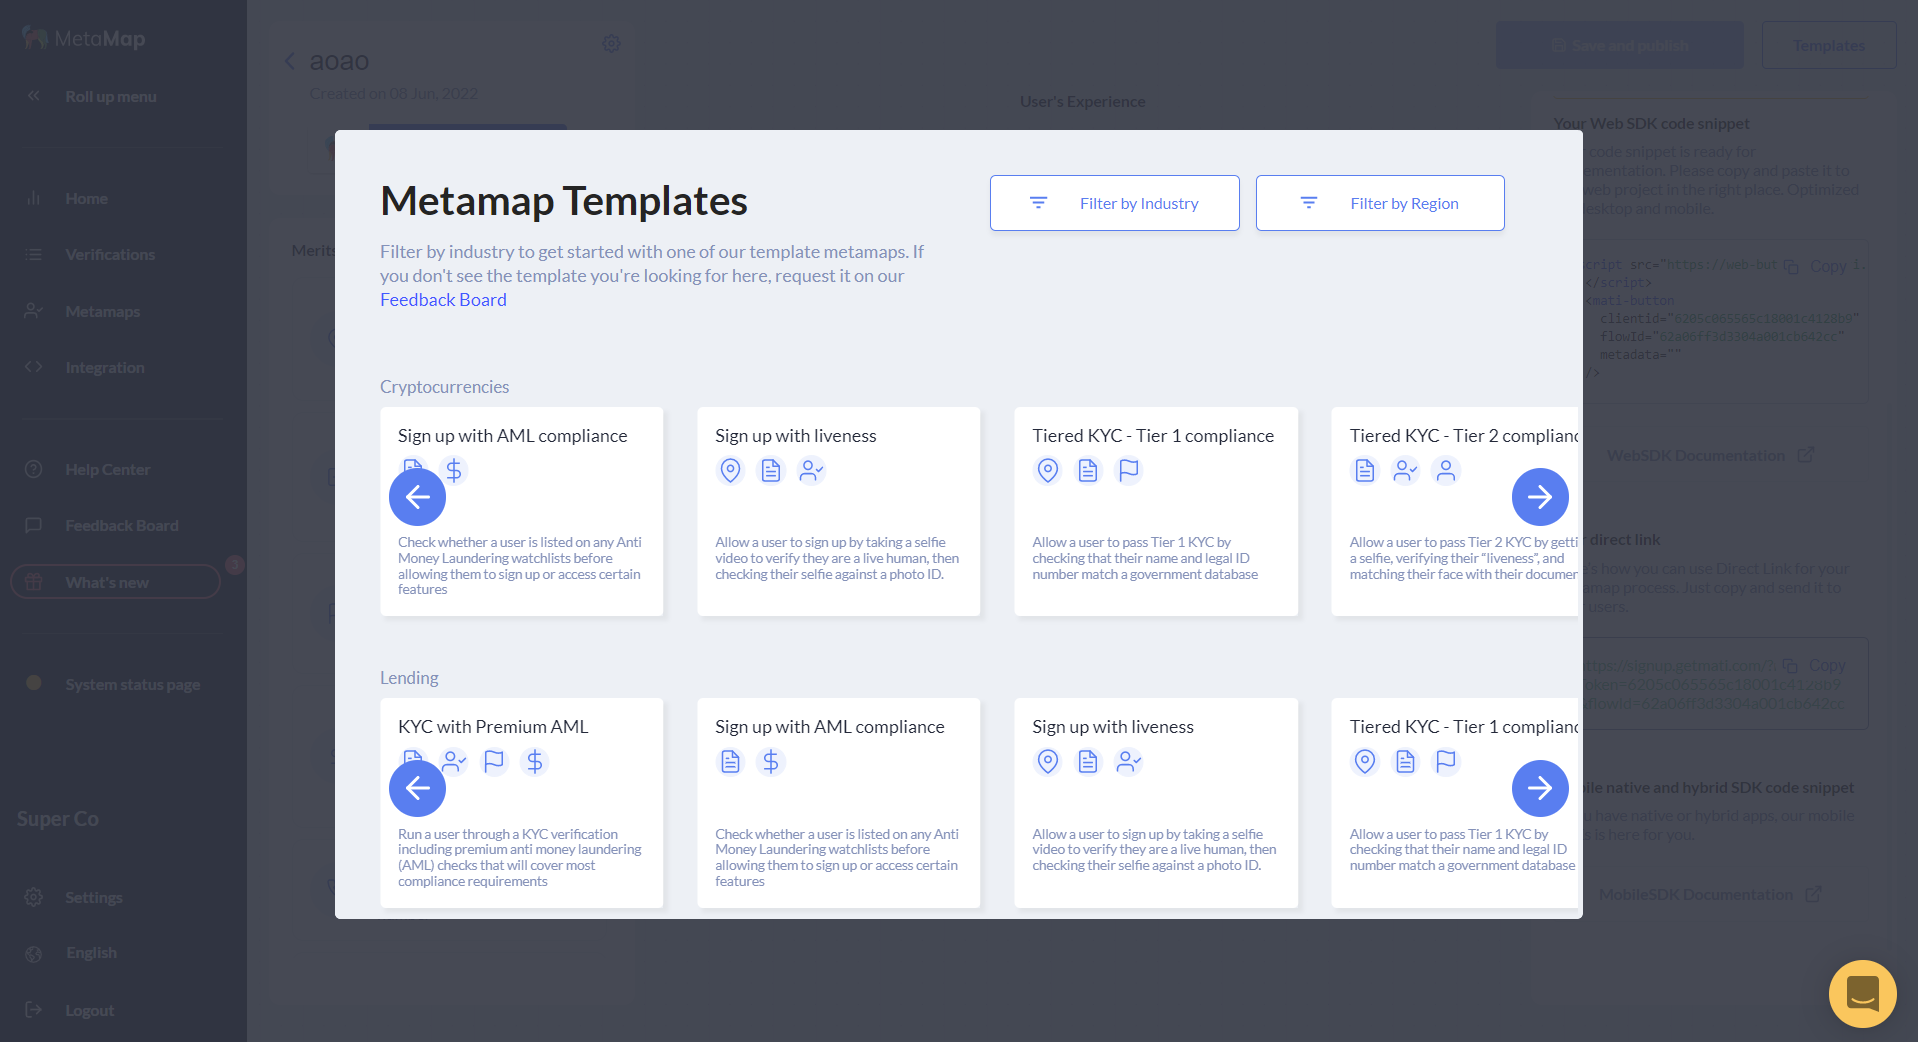
We have compiled some of the commonly used workflows into our template library, which you can explore by Industry and Region. Here's how to use it:
- Click on the Workflows tab
- Select either "Build new workflow" or select an existing workflow
- Click on the "Templates" button on the top right
- Hover on a card and select a template to apply it to your workflow

For the majority of our products, regardless of if you use our API and SDKs, you will need to create at least one workflow in your dashboard.
Start from scratch
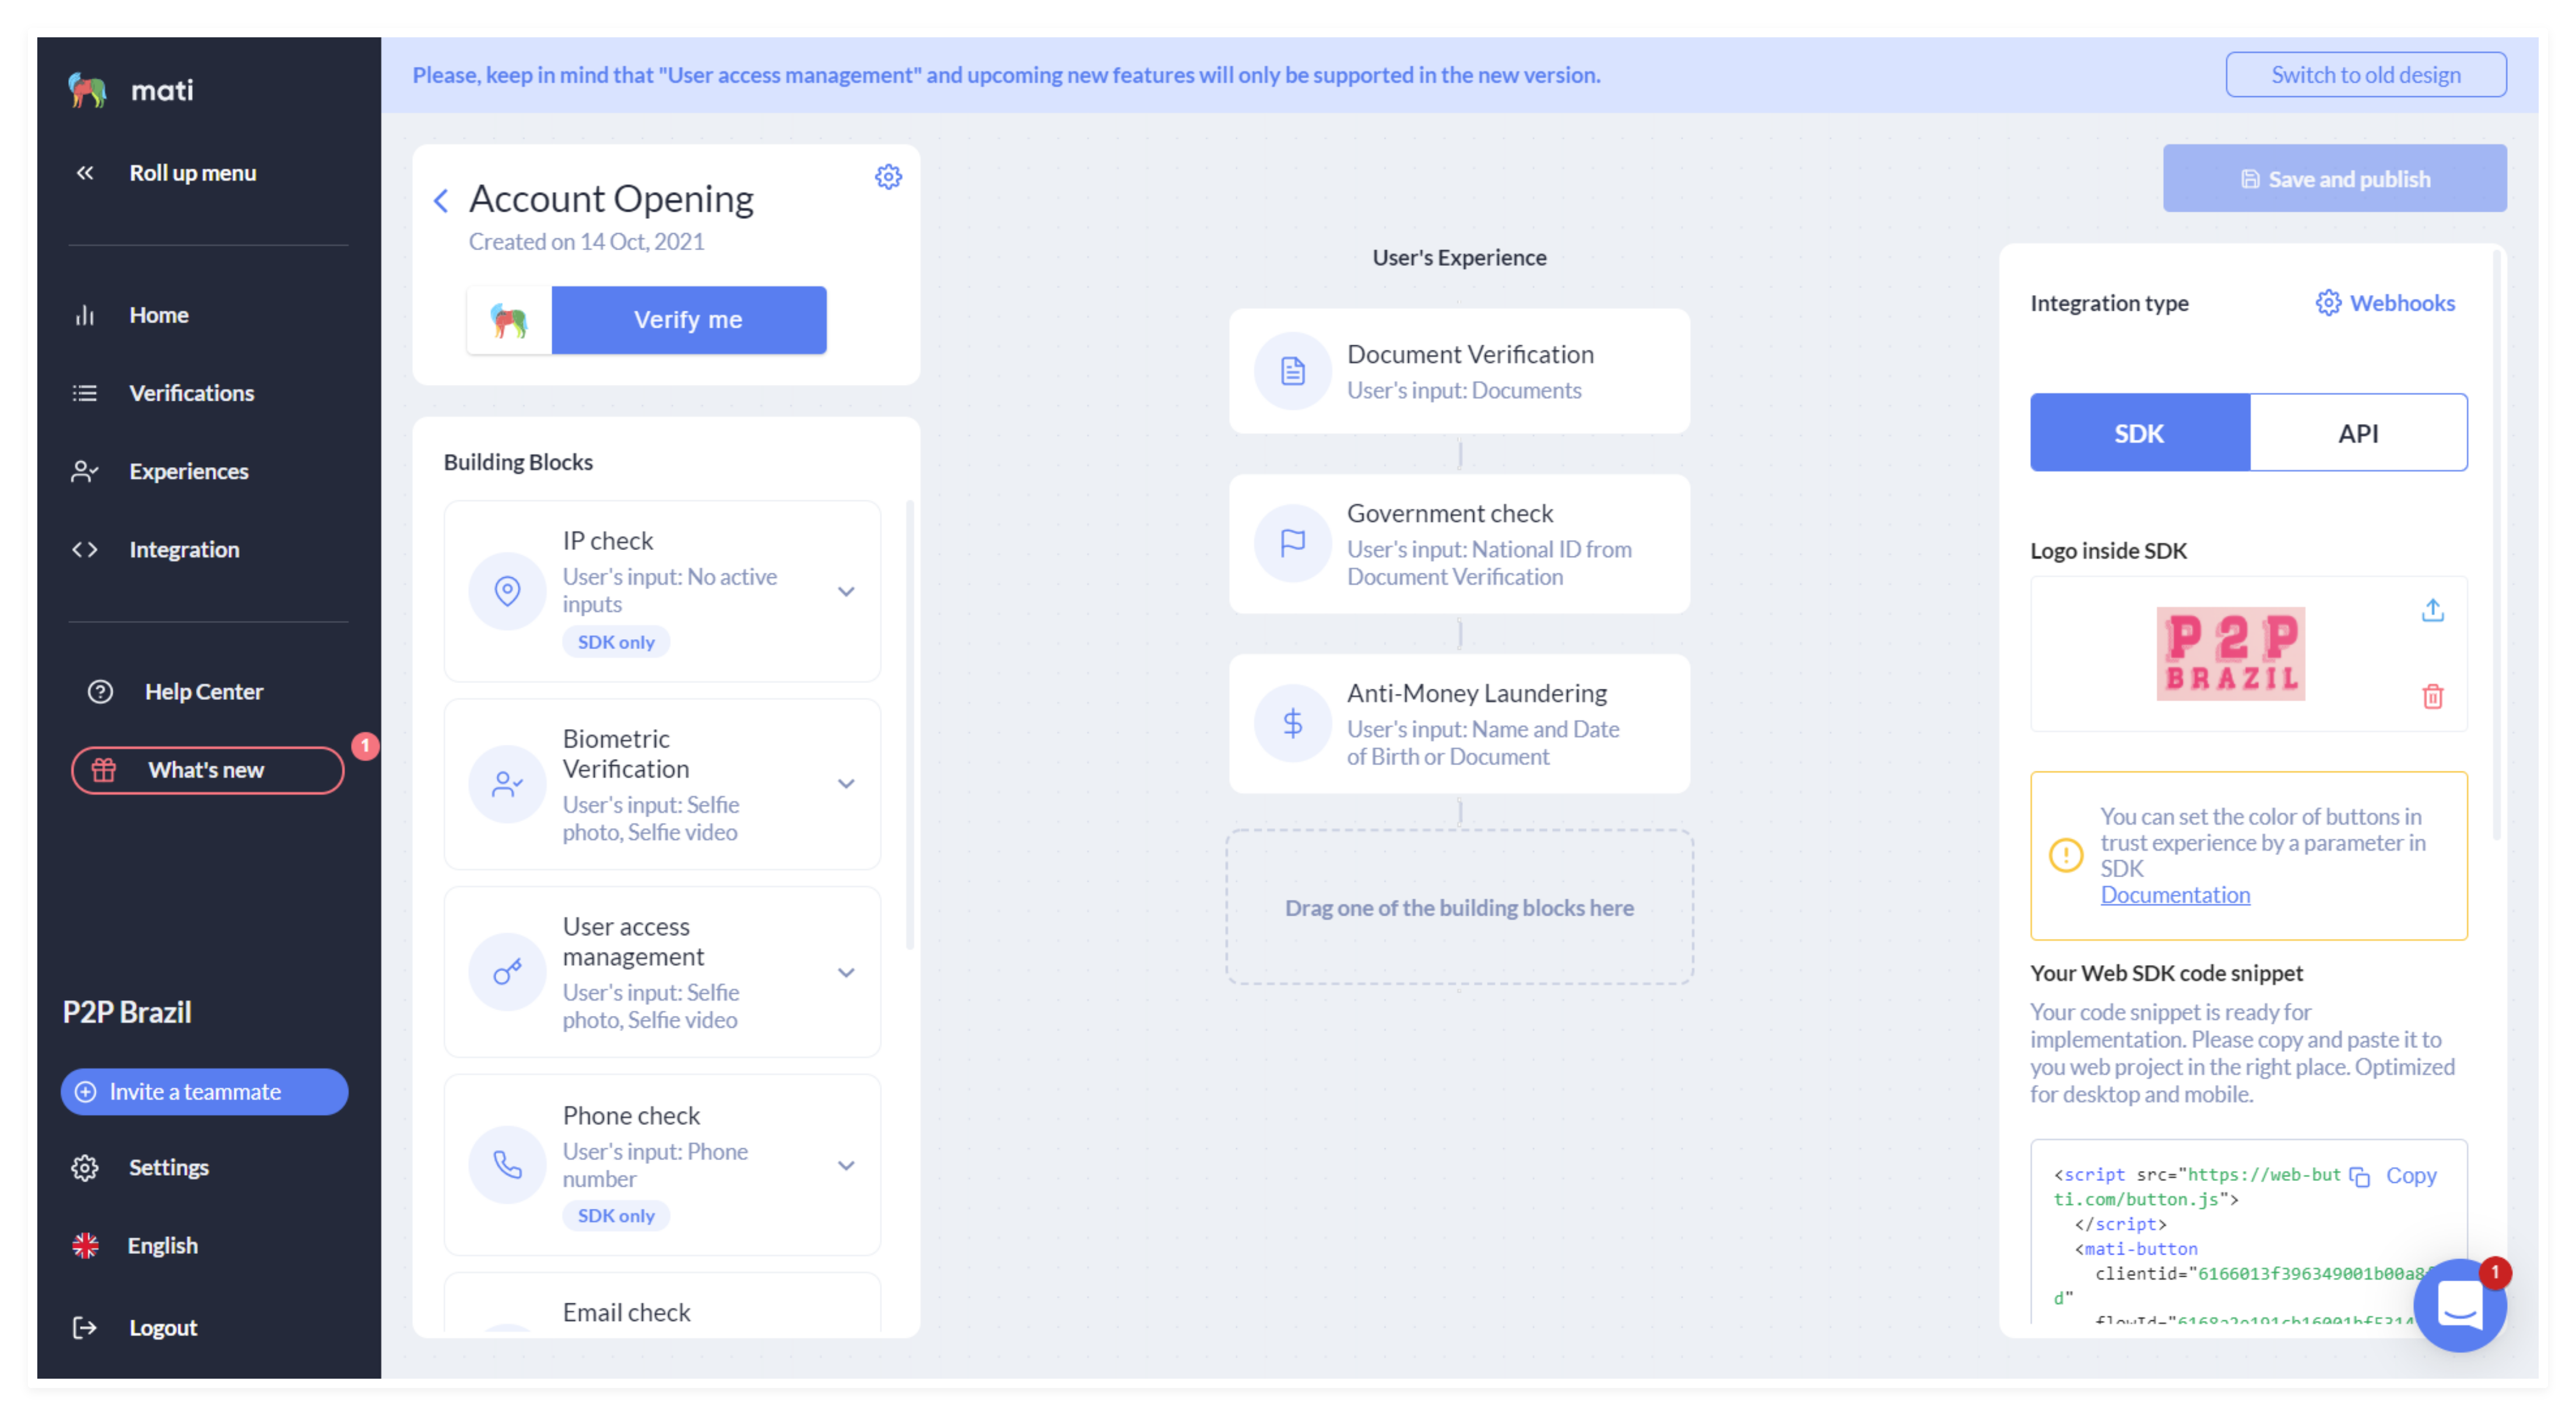
For each workflow, you can customize which merits to include. Within each merit you can configure inputs such as the documents required, biometric steps, country requirements or restrictions, activate additional checks and even define which data policy applies to the information created by your customers.
To do this, enter the MetaMaps tab in the Dashboard. Select "Create New Workflow" and start dragging the merits from the left panel into the User's Experience in the center of the screen. You can configure each merit you have selected in the right panel. If you are using our SDK, you can customize it in just a few clicks. Once you have finished building your workflow, select "Save and Publish".
If you need more than one type of workflow, (for example, if you are operating in different countries) you can add and configure a different type of workflow for each of your use cases.

Get your Client ID and Workflow ID
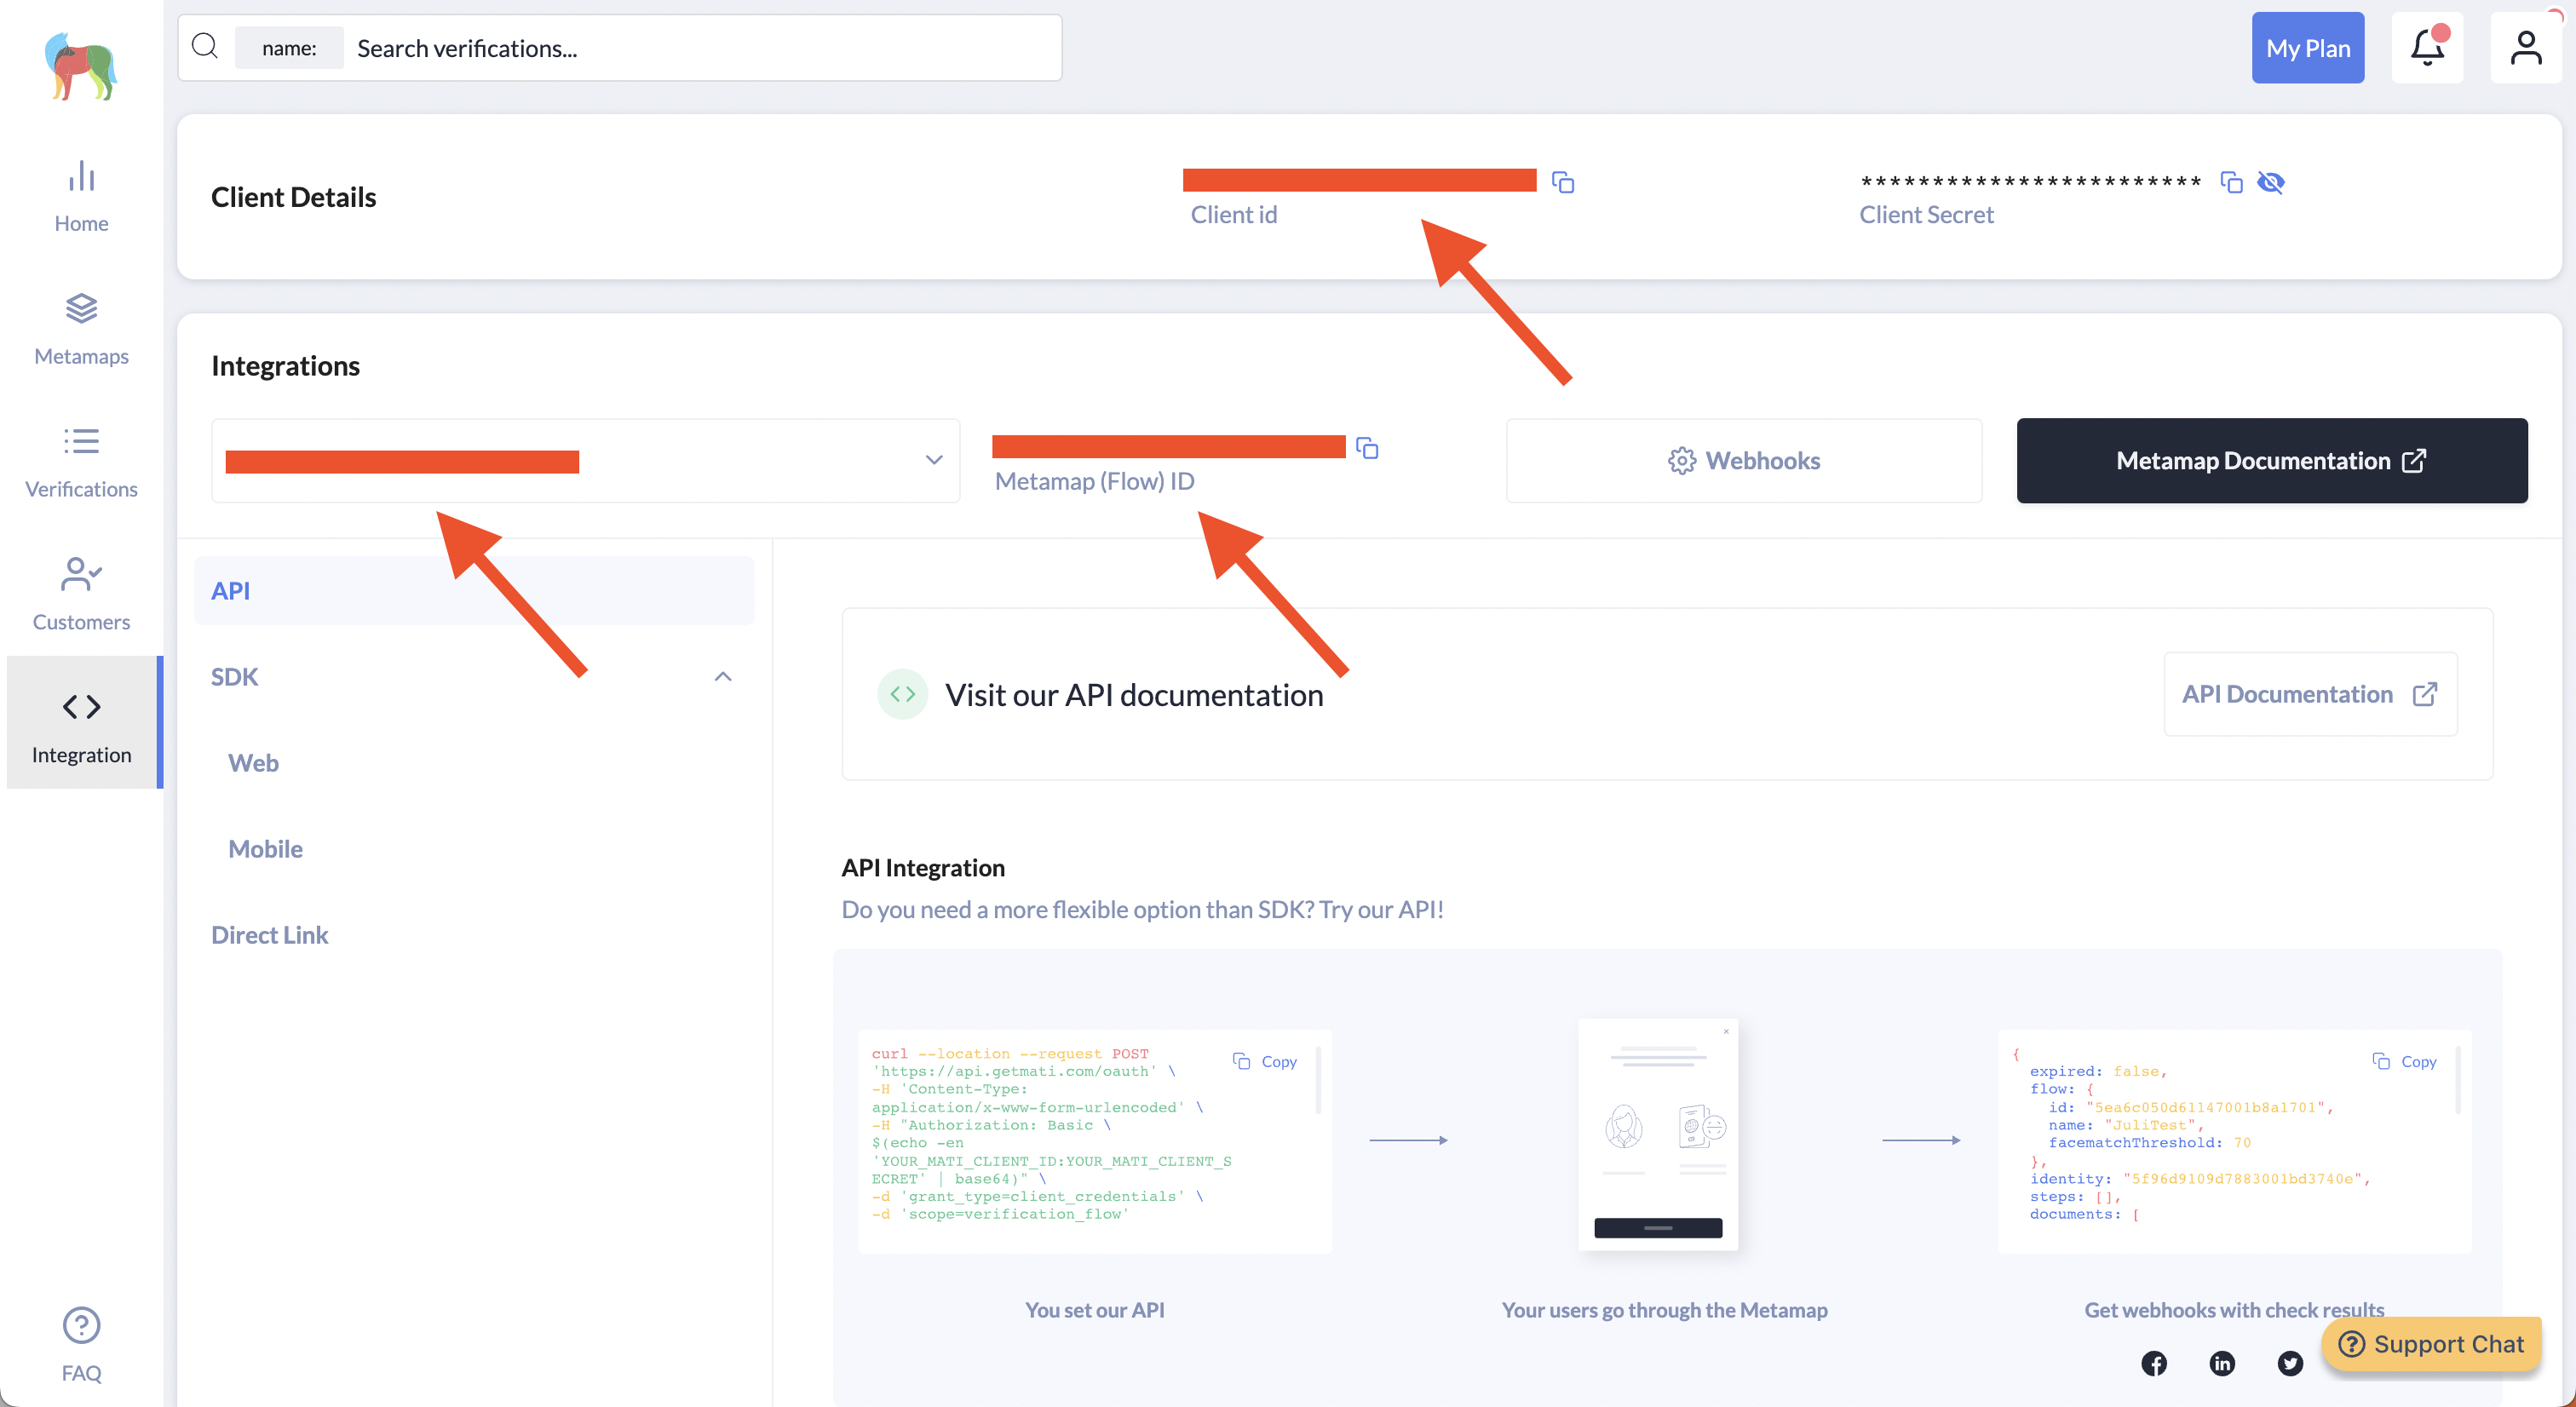
You will need to get the client ID and workflow ID for the workflow you want to implement via SDKs or API. There are a few ways to get the workflow ID from the Dashboard:
- In the Integration tab, select your client ID.
- In the Integration tab, select your workflow from the dropdown and copy your workflow ID.

- In the metamaps tab, the workflow ID is the 24-character alphanumeric string inline with your workflow name.
Workflow settings
You can view your workflow's setting by opening the metamaps tab, selecting your workflow, then clicking on the gear icon next to your workflow's name in the left-hand panel with the "Verify me" button.
Within your workflow's settings, you can:
- Edit your workflow's name
- Find your workflow ID
- Toggle the GDPR setting
- Toggle the certified timestamp setting
- Set the database request timeout setting
GDPR compliance
MetaMap will store your customer data indefinitely unless you turn on General Data Protection Regulation (GDPR) and set when the data expires. To set the GDPR length:
- Toggle the "GDPR" setting to "ON"
- Select the number of days before the data expires (1-1096 days)
Certified timestamp
MetaMap can attach a certified timestamp as part of the individual's verification data as legal evidence that the verification occurred. You or your auditors can then view the verification details on a recognized third party's system at any time.
Database request timeout
In the event that a data provider experiences an outage, you can set how long MetaMap should try to connect and complete the verification.
- The default timeout is 12 hours
- 5 minutes ≤ timeout ≤ 23 hours, 55 minutes
- MetaMap will try to connect every 5 minutes until the timeout period is reached
Updated over 1 year ago