Customer Access Management
Use this tool to re-verify an existing customer based on their previous biometric verifications.
Overview
The Customer Access Management tool, allows merchants to perform biometric authentication on individuals for specific business needs. This feature enables merchants to ensure that the individual accessing their services or systems is the same individual who previously passed the initial KYC (Know Your Customer) verification.
Get Started
Availability
- 🌎 Available globally
- Available for Direct Link, Web/Mobile SDKs, and by API
Features
- We run a face-match (based on the threshold set by you) between the selfie/video submitted by the individual and the selfie/video in the previous verification
- Liveness - We check whether the individual's selfie video shows a live human.
Setup
There are 3 main steps to set up the Customer Access Management merit:
- Setup your metamap on the dashboard
- Integrate or use MetaMap's Direct Link
- Process verification results
Step 1: Setup a Workflow
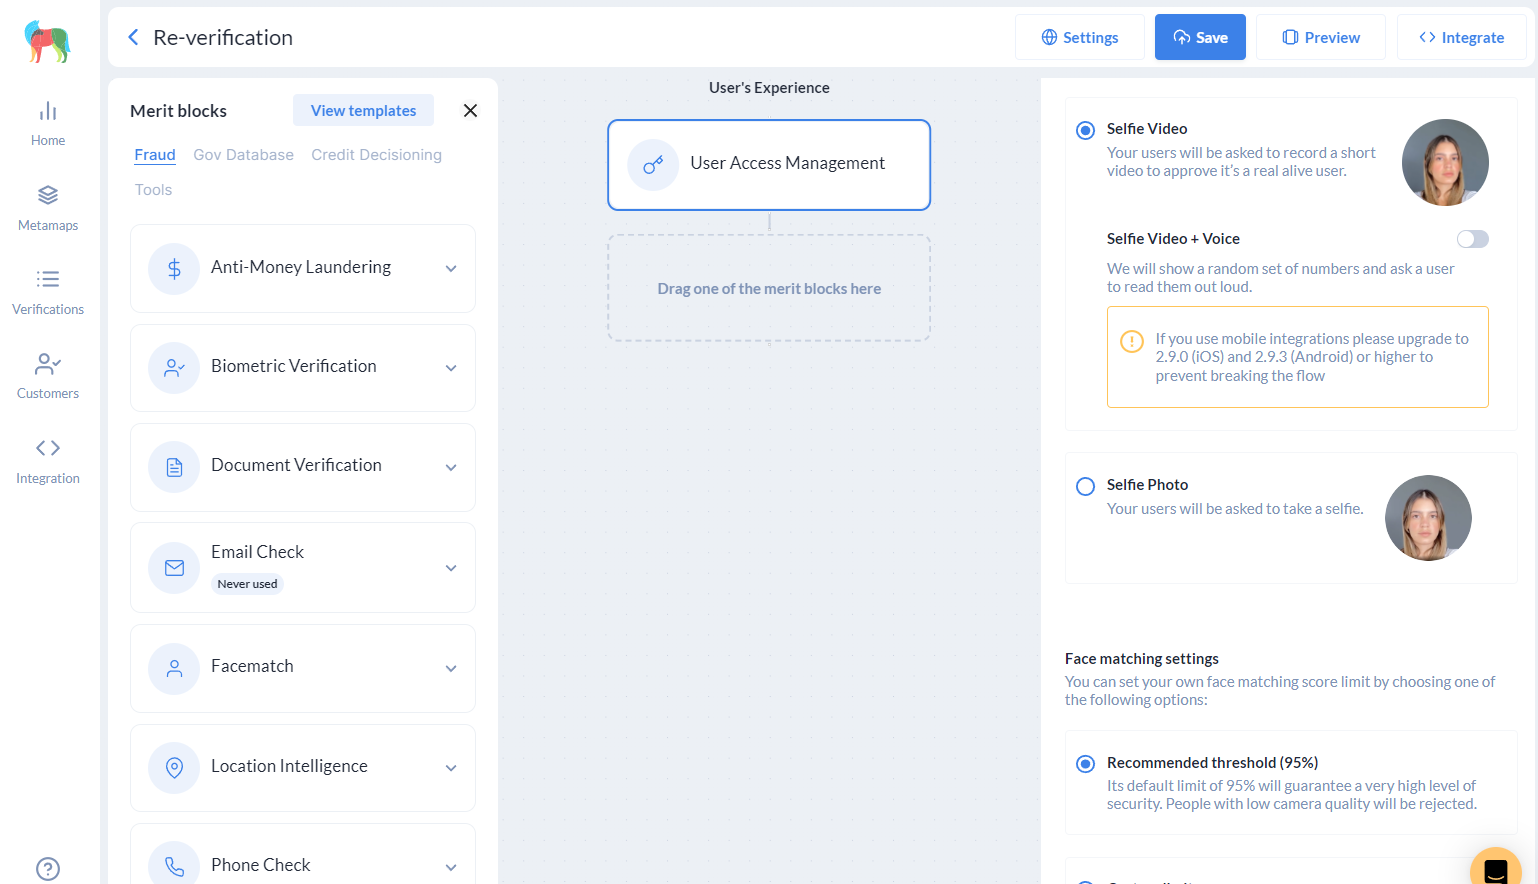
In the MetaMap dashboard, go to the Workflows section and build a new Workflow using the blue button. Once you get to the Workflow Builder, find in the left pane the Customer Access Management tool, under the 'Fraud' category, and add it to the Customers's Experience in the central pane. You can delete any other existing merit blocks. Your Workflow should look like the following one:
Step 2: Integrate
In order to use the Customer Access Management tool, an individual should be verified through a workflow with a biometric check. This initial verification will serve as the reference identity for future re-verification processes. Make sure to take note of the Identity ID associated with this verification.
When integrating the re-verification flow include a new parameter called identityId, which corresponds to the Identity ID obtained in the user's initial verification.
You can get the identityId value from the callback events when using MetaMap SDKs and from the request response when using our API under the identity tag at the Start Verification step.
Integrate using Direct Link
Add the identityId parameter to the Direct Link URL.
https://signup.getmati.com/?merchantToken={{clientId}}&flowId={{flowId}}&identityId={{identityId}}
Integrate using SDK
Web SDK
Add the identityId parameter to the Web SDK script
<script src="https://web-button.getmati.com/button.js">
  </script><mati-button
id="mati_button"
clientid="{{clientId}}"
flowId="{{flowId}}"
identityId="{{identityId}}"
 />
Android SDK
Add the identityId parameter in the Metadata object as explained here.
iOS SDK
Add the identityId parameter in the Metadata object as explained here.
Integrate using API
Creating the Customer Access Management flow instance
When calling the Start Verification API endpoint add the identityId parameter in the request body.
{
  	"flowId": "{{flowId}}",
    "identityId": "{{identityId}}"
}
Sending the Customer Access Management input files
This step has 2 main differences compared to the usual step you follow when sending inputs.
- You should use the following API endpoint to send the file, instead of the endpoint you usually use for sending inputs:
https://api.getmati.com/v2/verifications/{{verificationId}}/send-input
- You should use the
verificationIdas endpoint parameter instead of theidentityId. TheverificationIdcomes underidtag in the request response when creating the instance.
{
    "documents": [],
    "expired": false,
    ...
    "identity": "{{identityId}}",
    "inputs": [...],
    "steps": [],
    ...
    "id": "{{verificationId}}",
    ...
}
Using Metadata
If you are sending Metadata as part of the Customer Access Management flow, it will me merged with Metadata object used in the initial verification, so you will receive back one single Metadata object with the content of both flows.
Step 3: Customer Access Management results
Dashboard
You can see the Customer Access Management result in the dashboard, along with the original and current biometrics.
Webhooks
You will need to configure your webhooks, then handle the webhook responses that will be sent to your webhook URL.
For Customer Access Management you will receive a webhook with a re-facematch step id. This webhook contains the score obtained from the facial comparison under the facematchScore tag as well as secure links to the biometric media files. Find samples for successful and unsuccessful results in the following box:
{
  "metadata": {
    "OriginalFlowMetadataKey": "OriginalFlowMetadataValue",
    "CurrentFlowMetadataKey": "CurrentFlowMetadataValue"
  },
  "resource": "https://api.getmati.com/v2/verifications/{{currentVerificationId}}",
  "step": {
    "status": 200,
    "id": "re-facematch",
    "data": {
      "currentSelfiePhotoUrl": "https://media.getmati.com/file?location=eyJhbGciOiJ...",
      "currentSelfieVideoUrl": "https://media.getmati.com/file?location=eyJhbGciOiJ...",
      "facematchScore": 99.98845,
      "previousSelfiePhotoUrl": "https://media.getmati.com/file?location=eyJhbGciOi...",
      "previousSelfieVideoUrl": "https://media.getmati.com/file?location=eyJhbGciOi...",
      "previousVerificationId": "{{previousVerificationId}}"
    },
    "error": null
  },
  "eventName": "step_completed",
  "flowId": "{{flowId}}",
  "timestamp": "2023-05-26T20:29:16.634Z"
}
{
  "metadata": {
    "OriginalFlowMetadataValue": "001",
    "CurrentMetadataValue": "12345"
  },
  "resource": "https://api.getmati.com/v2/verifications/{{currentVerificationId}}",
  "step": {
    "status": 200,
    "id": "re-facematch",
    "data": {
      "currentSelfiePhotoUrl": "https://media.getmati.com/file?location=eyJhbGciOiJIU...",
      "currentSelfieVideoUrl": "https://media.getmati.com/file?location=eyJhbGciOiJIU...",
      "facematchScore": 3.8107125,
      "previousSelfiePhotoUrl": "https://media.getmati.com/file?location=eyJhbGciOiJI...",
      "previousSelfieVideoUrl": "https://media.getmati.com/file?location=eyJhbGciOiJI...",
      "previousVerificationId": "{{verificationId}}"
    },
    "error": {
      "type": "StepError",
      "code": "facematch.notConfidentComparison",
      "message": "The person on photos might not be the same",
      "reasonCode": "notConfidentComparison"
    }
  },
  "eventName": "step_completed",
  "flowId": "{{flowId}}",
  "timestamp": "2023-05-26T20:38:06.806Z"
}
Updated over 2 years ago